You either own an Apple Watch Series 0 (Apple's first smartwatch) or an Apple Watch Series 1 or 2. You use the device for fun or for work - or preferably both at the same time. Nevertheless, a little variety every now and then doesn't hurt. You don't have as many change options on the Apple Watch as on the iPhone and iPad. Nevertheless, we will show you how to adapt at least the background image and the clock face to your wishes (and then almost wear a whole new smartwatch on your wrist!). Buy Apple Watch straps.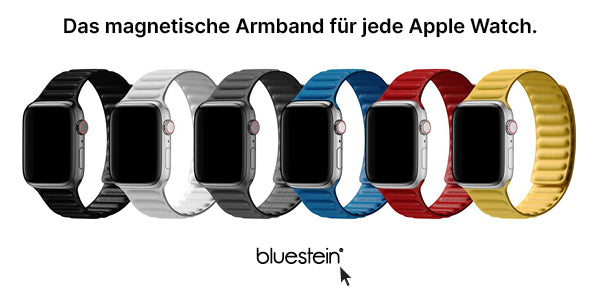
Everything new with one swipe
The many different colors and designs invite you to experiment with your Apple Watch. So, in this post, we're going to show you some tips ranging from simply changing the watch face to changing the time.
Let's start with a simple exercise: changing the watch face. If you find your current watch face too boring, you can simply use Apple Watch's OLED touchscreen to change it. To do this, swipe once from left to right across the display - done. You see, you don't have to be a tech guru to work with the Apple Watch. You can't break anything either. Simply swipe the display until a watch face that suits your taste appears.
Adjustments in detail. Apple Watch Armband Shop.
But it is still much more individual. If you don't want to rely on Apple's default settings, you can customize the watch face yourself in quite a bit of detail - and it works like this:
First, press the crown on the side of your Apple Watch. You should now see the clock face. Then simply press firmly (!) on the display. The firm pressure is important because the Apple Watch distinguishes between a light tap and a real pressure.

Now swipe left or right until you get to the watch face you want to adjust. Once you've selected a watch face, lightly tap the Customize indicator again. In the following menu, you can simply swipe left or right to cycle through your watch face's functions. If you want to adjust them, simply turn the crown on the side. watchOS is quite adaptable here. You can even change small details, such as the color of the second hand or the individual markers on the dial. Apple Smartwatch Armband.
It gets even more interesting when you work on the so-called complications. To make this work, you simply tap on one of the small fields and then turn the crown so that you can edit it. You can also add third-party complications at this point (and you'll learn how to do that in the next big section).
You're done? Then press the crown again for the changes to take effect. Then tap again on the watch face you just edited. This ensures that this watch face will be used from now on. Way too complicated? You might find it easier to change the clock face on your iPhone's large display. To do this, open the Apple Watch app and then go to the "Dial Gallery" menu item. The same options are available there as on the Apple Watch and iPhone Armband.
Insertion of new complications
You may not be satisfied with the information that Apple offers for a particular watch face. Then it would be useful to insert data from other apps - and luckily for you it actually works. Unfortunately, not all apps are compatible with the Apple Watch. So it is best to proceed as follows:


First, pick up your iPhone and open the Apple Watch app. Then tap on "My watch" and then "Complications". In the next box you will see some options.
The most interesting is the green plus symbol. This adds a complication to the app on your iPhone. Since both devices are permanently connected, this new information is also available on your Apple Watch. Proceed again as in the last step: press the crown and then firmly on the display and then the "Adjust" item. Then select one of the complications you want to change. After that, all you have to do is turn the crown until the information from your desired app is inserted into the watch face.
If you no longer want to use a certain complication, the red minus symbol will help. After you have tapped the symbol, you have to briefly confirm your selection again. If, on the other hand, you don't like the arrangement of the complications, hold your finger down on the three lines (the so-called "hamburger symbol"). After that, you can reschedule the complications as you wish.
Adding new watch faces
Maybe you want to customize a completely new watch face and use it in the future. Only a few steps are necessary for this.
First, tap the crown on the side. This should display the current watch face. Now you press once firmly on the display and go in the menu to the far right. There you will see a big, gray plus icon - tap on it! Now you simply turn the crown until you find the dial you want. As soon as you tap on it, you set this watch face as the new default.

As mentioned in other steps, you can also customize this new watch face to your liking. To do this, press once firmly on the display and then go to "Adjust".
By the way: Unfortunately, Apple does not yet provide a way to import watch faces from other developers. So you have to deal with Apple's choice. Maybe that will change with a future update of watchOS.
Too ugly - away with it!
You don't like a dial at all? That also happens! Then you should just delete it to avoid wasting space on Apple Watch.

First you have to switch to your current watch face. Now press the display firmly once. Then swipe left or right until you find the watch face you want to shoot into digital nirvana. Once you've selected the watch face, swipe up once. You will then see a red garbage can and a text that says "Remove". Tap once and the clock face is gone.
You should of course be reasonably sure of yourself. You could create a clock face again later. However, if it is a variant with numerous design changes, new complications and similar adjustments, this can of course become a bit tedious.
Changing the time on the Apple Watch
Normally, the time on the Apple is automatically synchronized with servers from the Internet, so the display should always be correct. However, you may still want to change the time for some reason - after all, you can also do this with a "normal" clock.
For this to work, you first open the settings of your Apple Watch. Then tap on "Time". There you will find the item "+0 min.". If you tap it and turn the crown, you can change the time. When you've set it to the time you want, tap "Set" again. If this trip to the options menu was just a gimmick, tap Cancel.
By the way, you can try this function quite safely. Appointments you have saved (as well as alarms and other time-based notifications) will still use the real time. So you only change something visually on the watch face, but internally watchOS always treats the time according to the correct time in your time zone.
A new picture is needed!
Not happy with your current wallpaper (aka Watch Face)? Then you should change it right away.
To do this, display the dial and then tap firmly on the display. Now go left or right until you get to the watch face that uses one of your own photos as the background. From there, tap the "Customize" button once more.
You will now have an overview of your current photos synced to the Apple Watch. Simply switch left or right by swiping across the screen. If you want to get a larger overview of your photos, you can simply turn the crown. This way you zoom out a bit and see several photos at once. Tap on the desired photo and you can select your favorite picture immediately.


When you find a photo, double click the crown. You will then see your current watch face again with the new photo as the background. Don't like the selection of images? Then you should grab your iPhone and open the Apple Watch app. From there, tap on "My Watch" and then on "Photos" and change the album that is synced to your smartwatch.
If you follow these steps, your Apple Watch should look completely different than before and really show what you use every day. And best of all, each step takes a few minutes at most. Have fun!



Share:
Saving electricity with the Apple Watch: Here's how!